TAGG readers: give a huge welcome to Erin, the fabulous do-it-yourselfer over at Thanks, I Made It! Each month, Erin is going to share with you one fashionable DIY that you can create at home (or idea: DIY/vino party!) — I absolutely love her take on this pretty Dannijo number — and in the coming months I look forward to introducing you to more uber talented TAGG contributors. Without further ado…
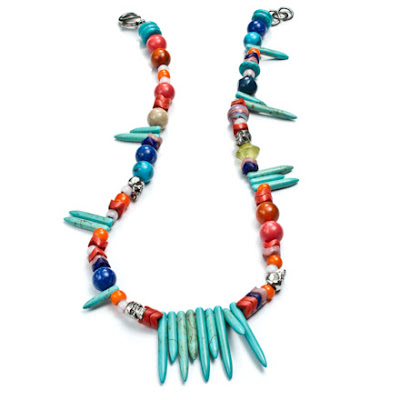
Hi everyone! Erin here. I work in education by day, but spend my free time searching for my next crafty project and thinking of creative ways to add personality to my style. I’m very excited to be a contributor to The Average Girl’s Guide, and hope to share with you DIYs that are easy, accessible and fun. You can also find a more tutorials and inspiration over at my blog, Thanks, I Made It. To kick things off for summer, I’m going to show you how to use a mish-mash of beads to create a colorful statement necklace inspired by Dannijo’s summer jewels. Weighing in at $195, here’s the Alina necklace by Dannijo:
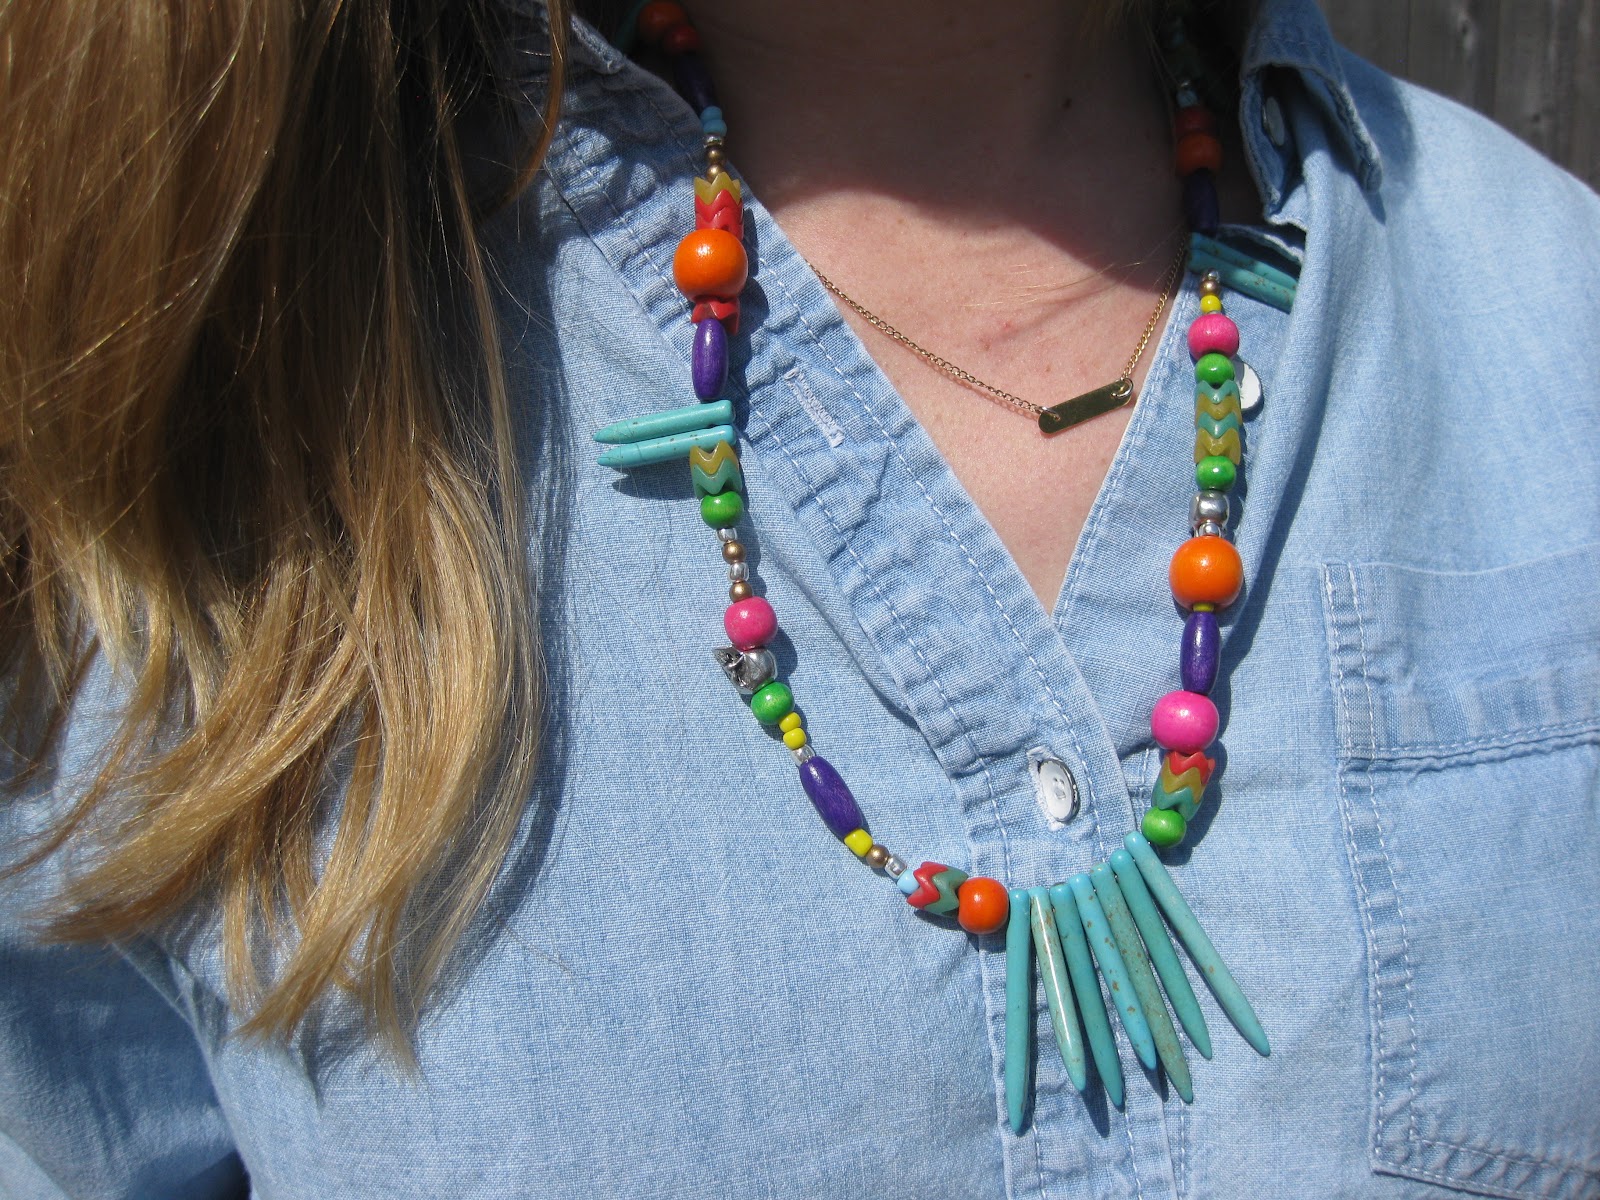
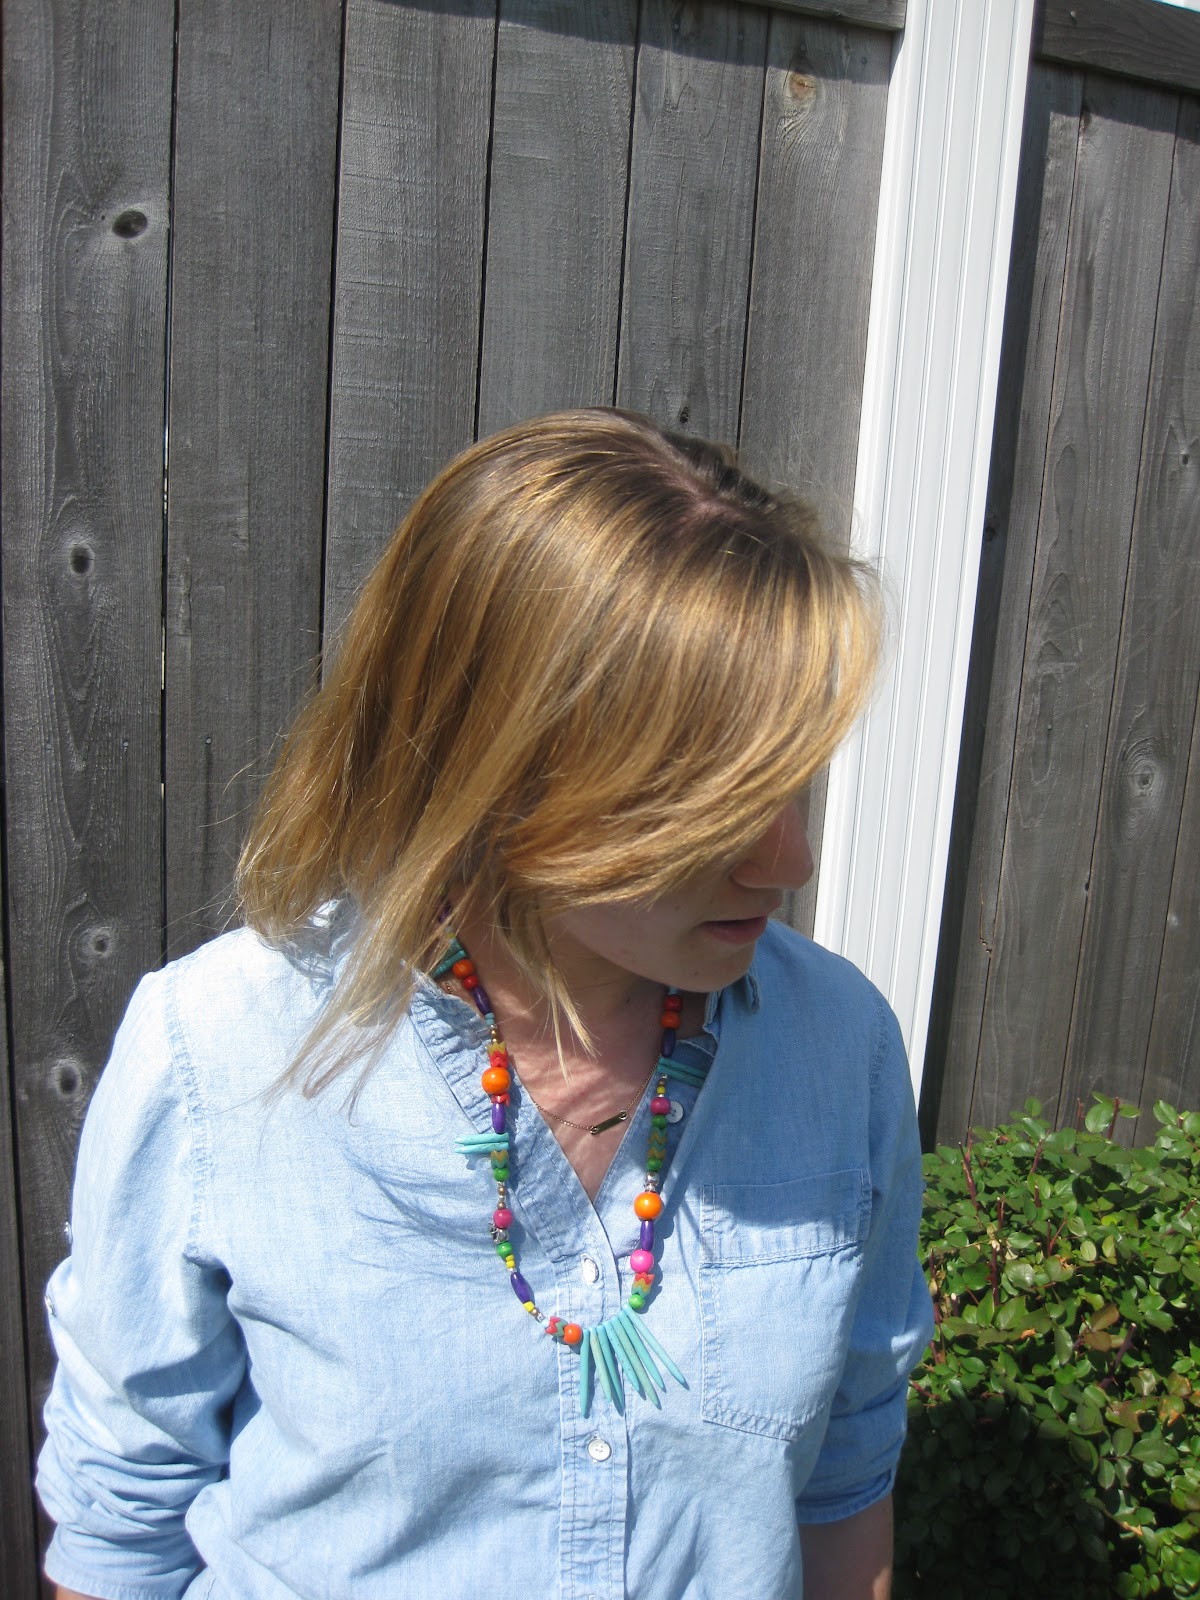
And here’s my version, which is less than $20 in materials:
Rule #1 about DIY is there are no rules. If you can’t find a bead that isn’t exactly what you wanted, don’t sweat it! Just use what you have, can find, or like best. It’s not just about recreating a design, it’s about putting your personal touch on a style or trend.
That being said, I have a lot leftover beads just like the spiky turquoise ones. I bought a huge strand of them for $15 (like
these) for another
DIY necklace last fall, and keep finding different ways to use the rest. I definitely recommend buying them if you like their look because they can be used
so many ways.
For the pointy beads, try your local bead store or Etsy for turquoise howlite stick/spike beads. You could use narrow
fan pendant beads like I’ve seen at Michael’s and Hobby Lobby as well. All other materials are readily available at jewelry supply stores and big craft stores. (The wavy beads are harder to find, but are called
snake beads, if you’re interested!). If you have a lot of these supplies already, this project will be very affordable. But if not, don’t fret, because you’ll now have some essential DIY jewelry supplies for future projects!
Tools and materials:
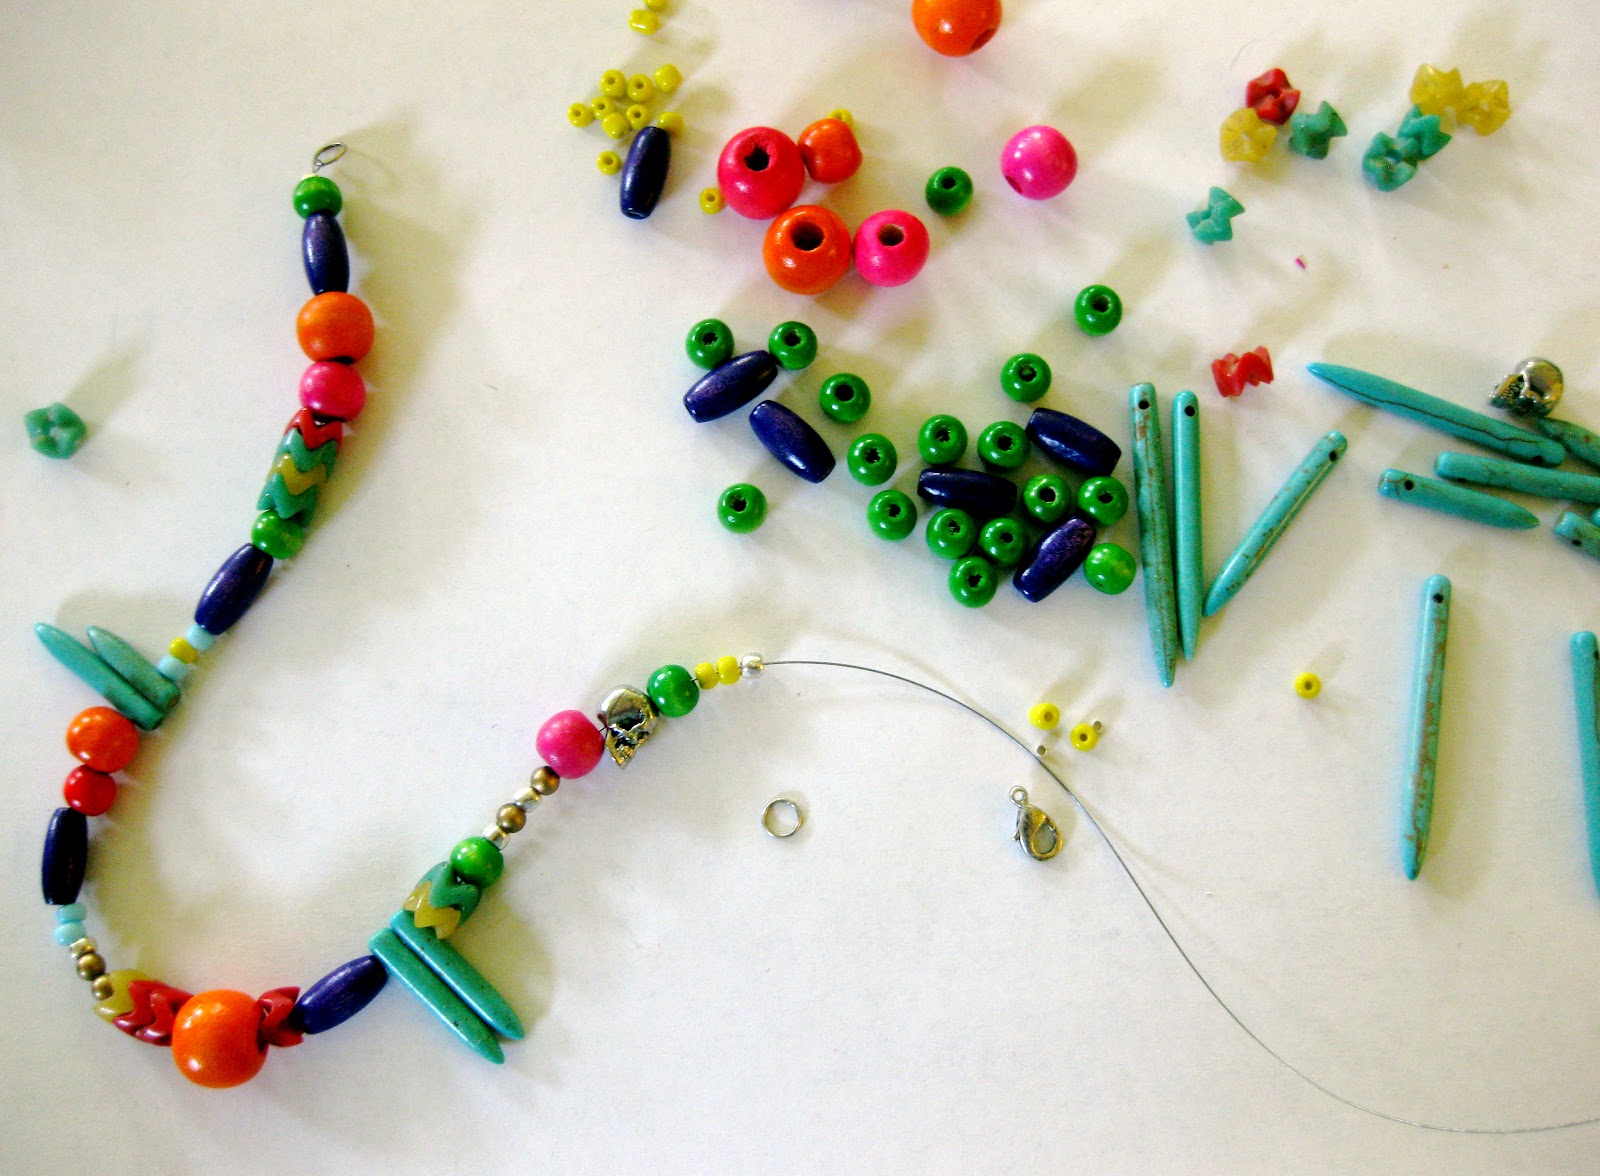
Beads in a range of colors, shapes, and sizes
Lobster clasp
2 Jump rings
Beading wire
Crimp beads
Pliers
Scissors
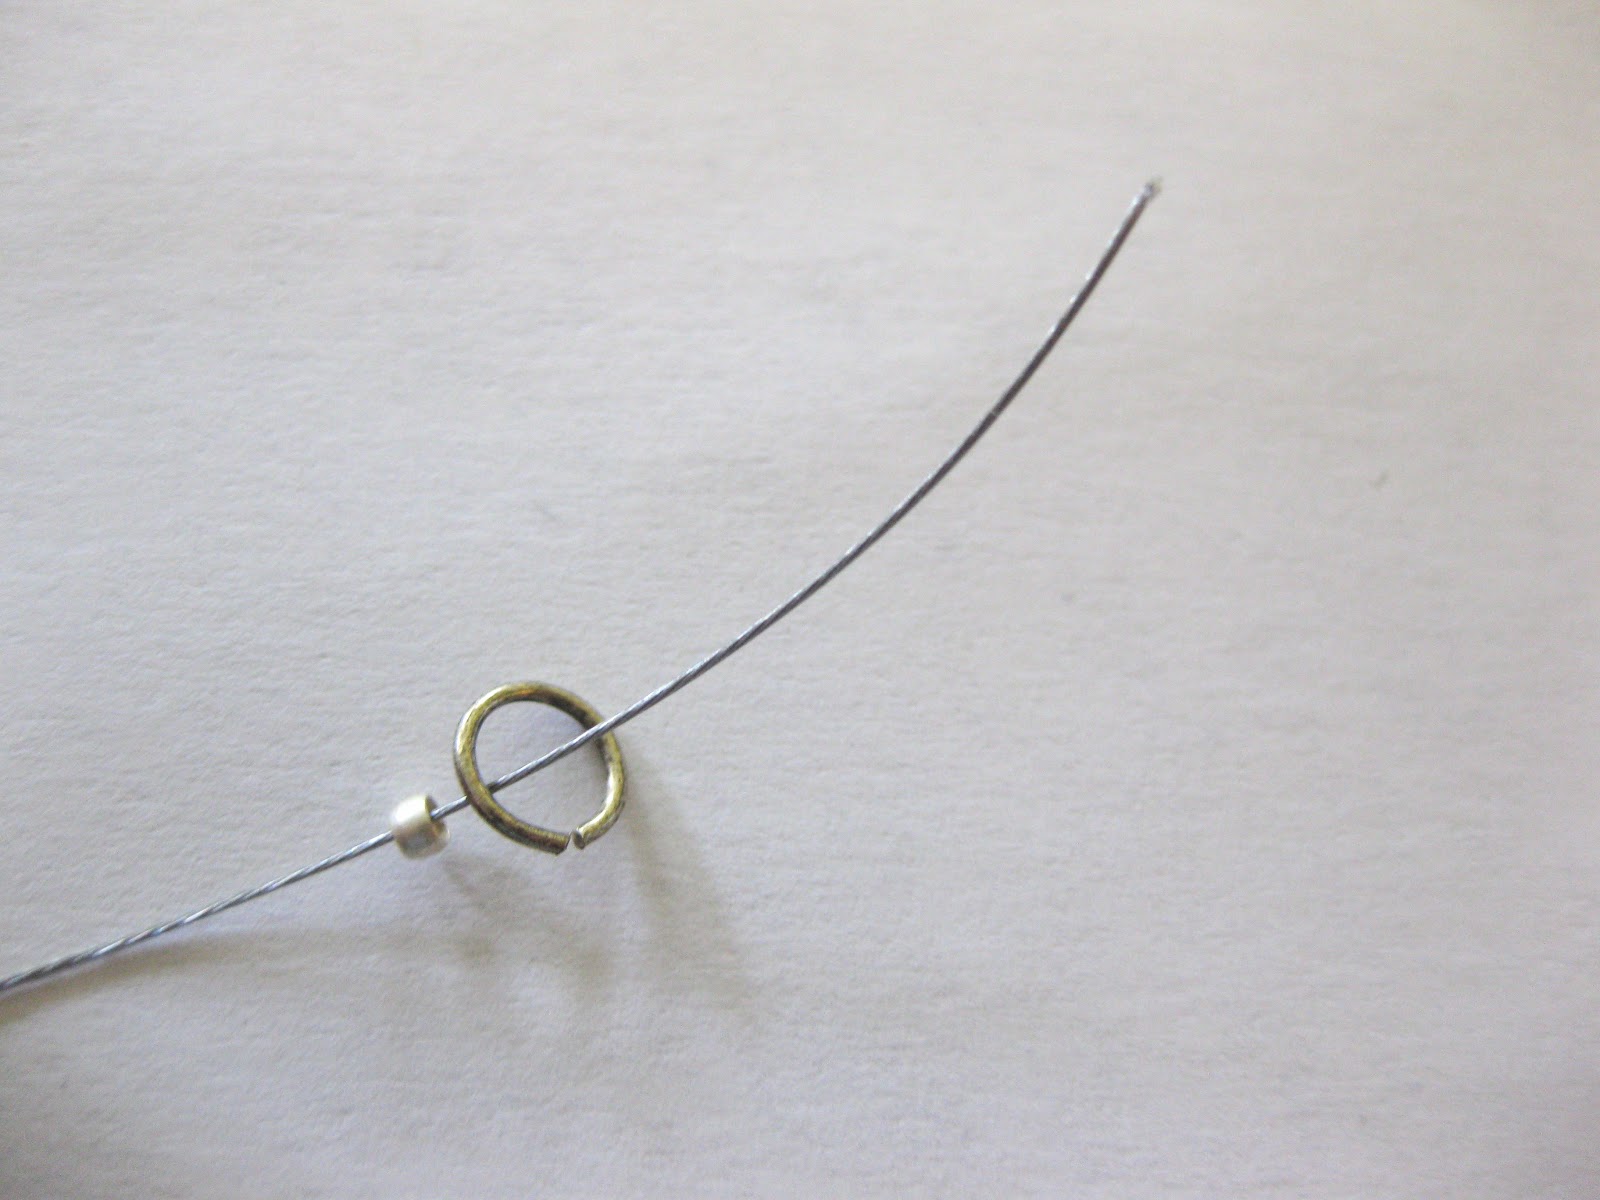
1. Cut a piece of beading wire 18 inches long.
2. Thread one of the crimp beads and a jump ring onto the wire.
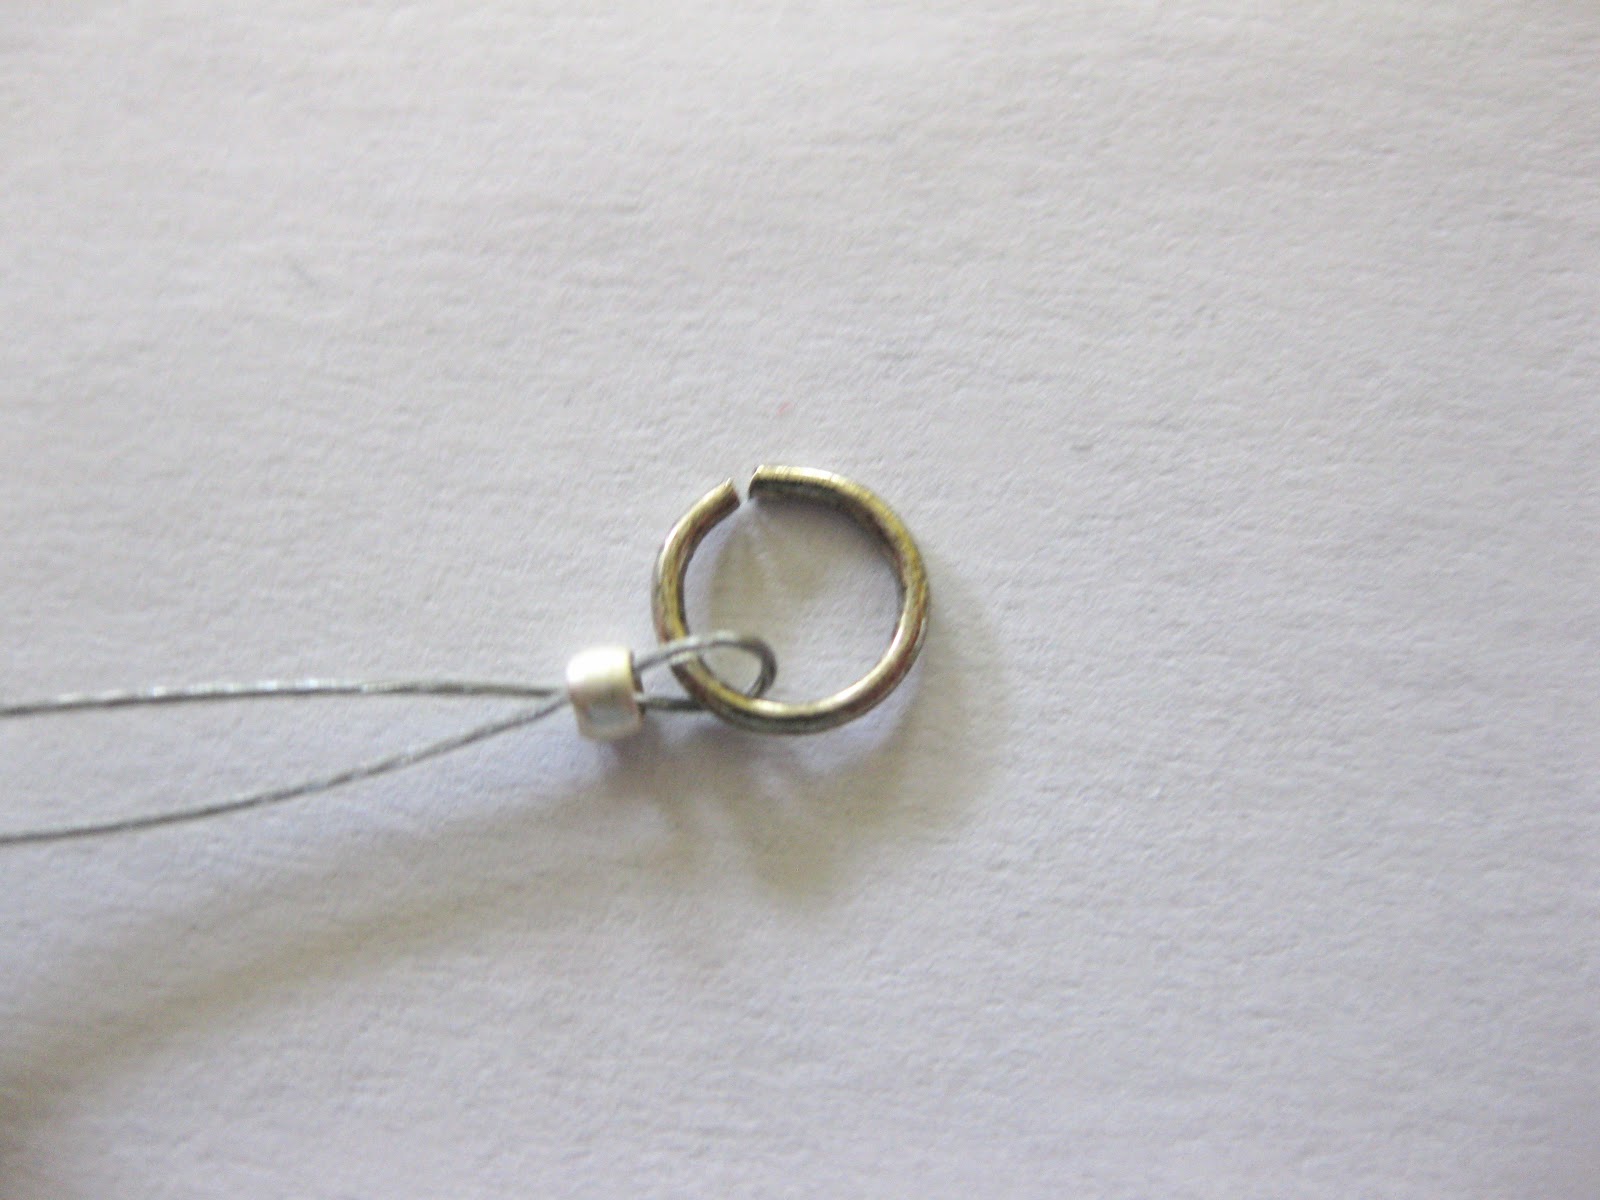
3. Fold the wire back onto itself, and into the crimp bead forming a loop around the ring. Use your pliers to press down on the crimp bead, squishing it flat so the bead now holds the wire loop in place. Trim any excess wire from the loop.
4. Begin stringing your beads onto the loose end of the beading wire.
5. When your about an inch away from the end of the wire, add another crimp bead, and fold the wire into a loop and crimp the bead in place as before.
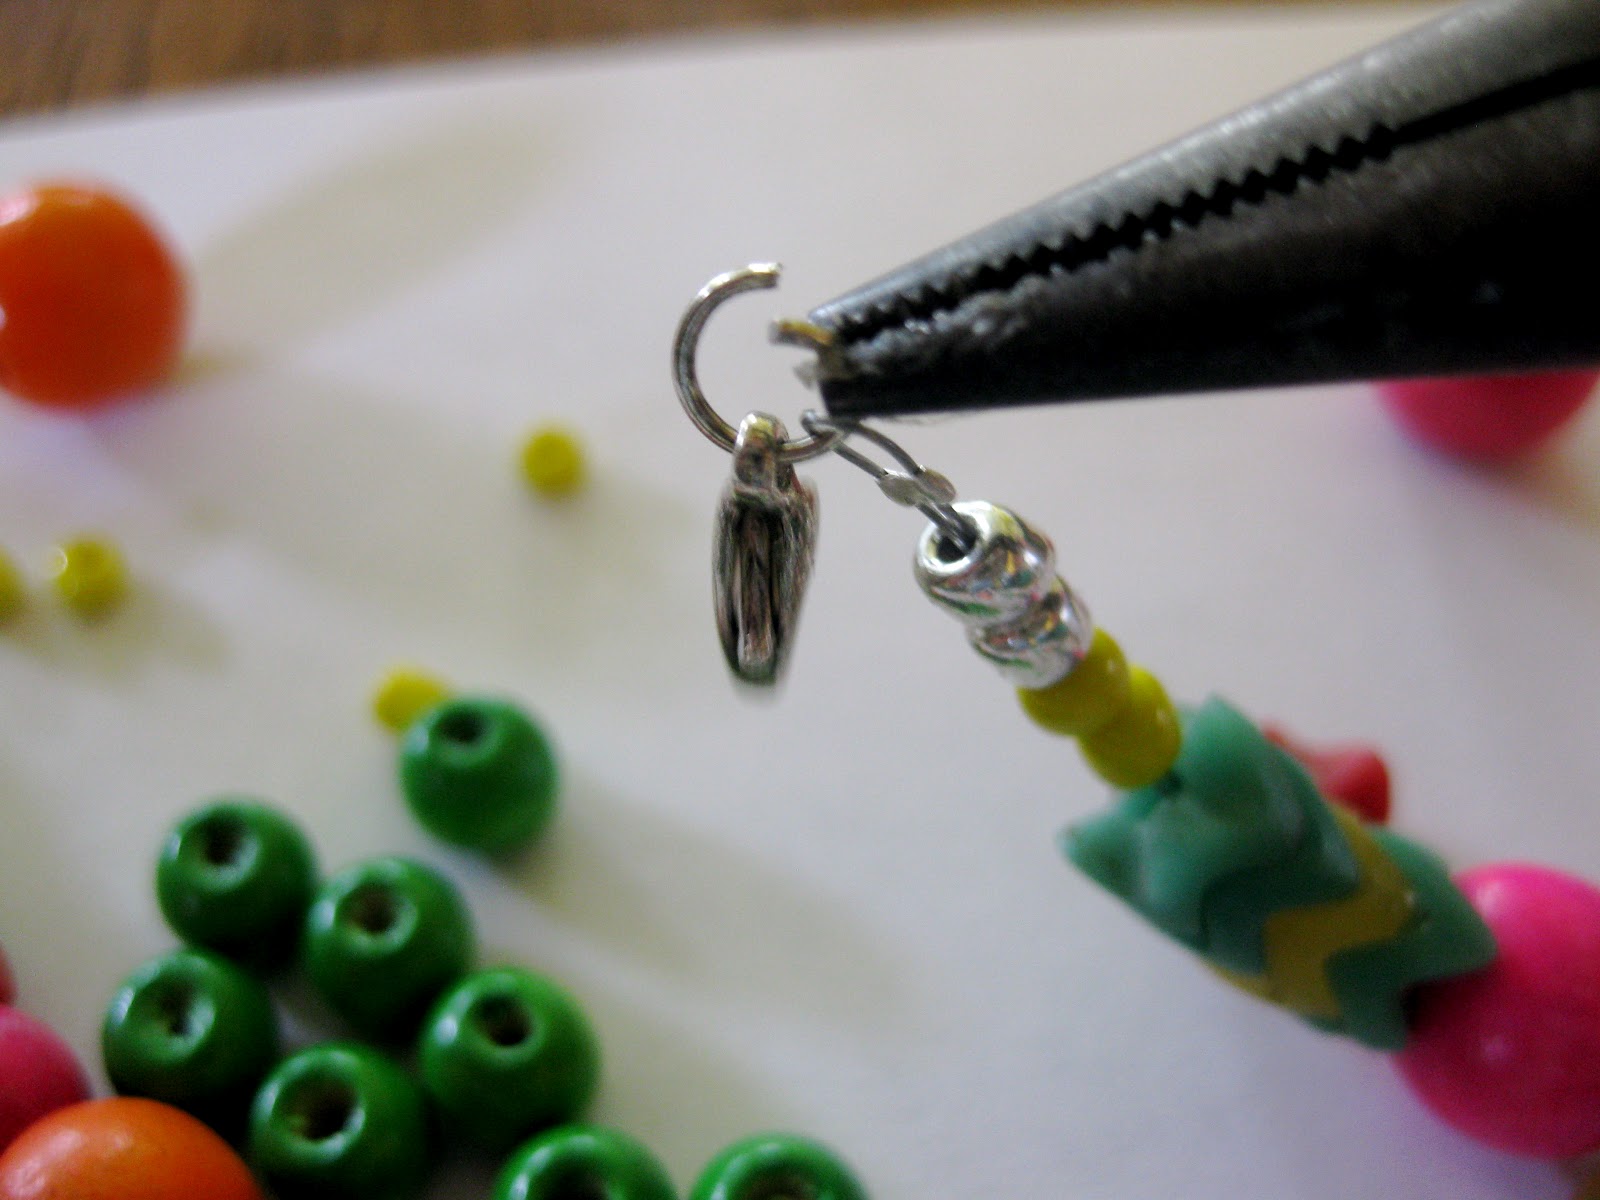
6. Use your pliers to twist the ends of the jump ring apart,
like so. Slide the lobster clasp onto the jump ring and close the ring. It’s important to know how to properly open and close a jump ring, because if not you’ll have a hard time getting the ends to meet again for a secure closure and weaken the metal.
That’s it, you’re done. Now go start summer in style!
Thanks again to Erin for this awesome DIY! Be sure to visit Thanks, I Made It to see more of her work and inspiration. You will not be disappointed!


May 4, 2012
LOVE this!!!
May 4, 2012
Wow - that is such a great DIY! I love what you did with your version: it is so fun!
May 3, 2012
Ok, now that is cool. I love how unique and vibrant it is! Great, great job. I am trying to learn more about jewelry making…it is much harder than it looks.
Cheers.
May 3, 2012
What a killer DIY! I want one!
May 3, 2012
Wow! I’m impressed. Great job on this DIY and the beads match up almost perfectly.
May 2, 2012
How fun! I’m very impressed!
« Older Comments