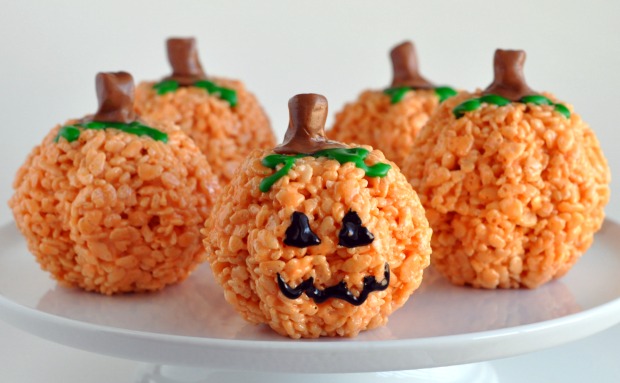
Short on time, but high on festivities? Ha! Me too. I’m not the most creative gal around — hence the lack of DIYs around this place — but I certainly love easy and creative ideas for Halloween. Some of these concepts are shockingly easy, while others (like that Boo sign) might take just a bit more work… though the payoff is so worth it! And, the devilishly delicious treats? Divine!
FOOD…
 Keep Reading —>>
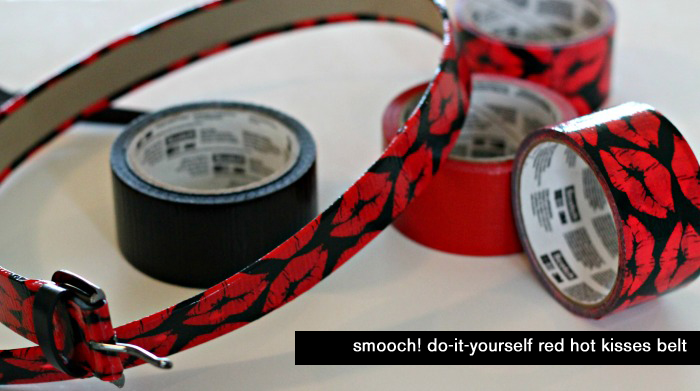
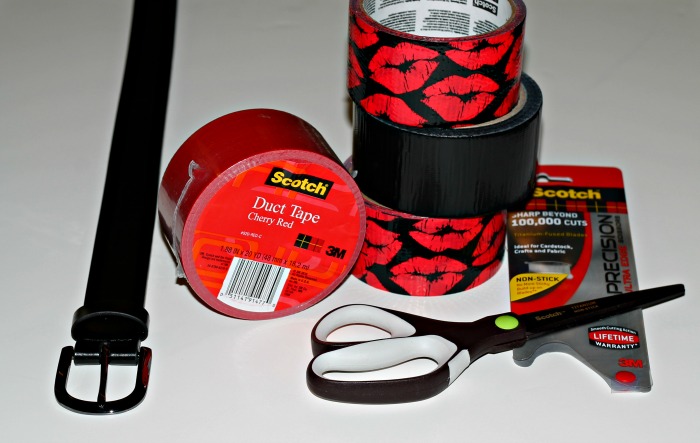
Red lips are a print I’ve already adored — in style, in art, in any form — for years, yet this average girl has never been totally sure she can pull it off in a major way. So when I saw the Scotch Colors and Patterns Duct Tape print I knew it was my opportunity to create something I could wear for a little sexy sass…. and a belt perfectly bit the bill. I mean how good is this print?? I’m so smitten, and perk: this DIY is so easy that even this DIY + time-time challenged gal easily pulled it off!
SUPPLIES
Scotch Colors and Patterns Duct Tape in Pucker Up, Black and Red
Scotch Precision Scissors (ps: most amazing/best cutting scissors!)
Black belt (this one is flat, good width and under $10)

Keep reading for the easy steps how to make a belt for yourself… Keep Reading —>>
Wishing Erin lived closer so I could give her a mah-jor hug for this one! Check out her easy and creative DIY jewelry storage solution… that would also make an amazing, heartfelt gift! It makes me want to make this, this or this even more to start filling this cutie up!
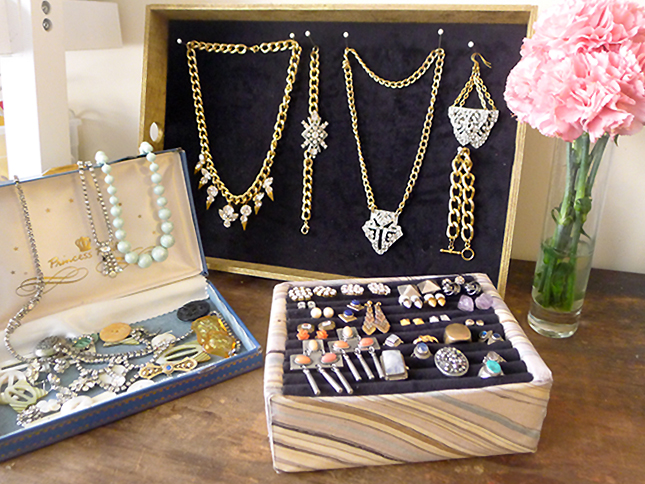 Hey TAGG readers! I’m back from over at Thanks, I Made It with a new DIY for you. When you’re an absolute jewelry fiend like me and my girl Alyson here, you tend to crave solutions to store your baubles just as much as your next statement necklace. With my ever-growing collection of rings and earrings (lots of DIY earrings over at Thanks, I Made It!), I need a clear way to organize and display them that is pretty and functional.
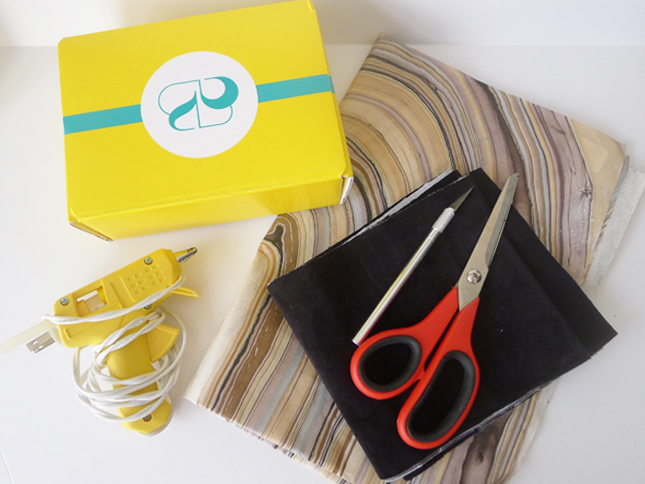
Tools and materials:
Velvet or other soft, cushiony fabric (I used a long piece 6 1/2 x 54 inches, folded in half)
Foam core
Small box (this one from a baublebar purchase!)
Craft knife and/or scissors
Ruler
Decorative paper
Hot glue and glue gun
Check out how easily this box transforms in the pictures and tutorial after the jump…{you know you’re curious!}
Keep Reading —>>

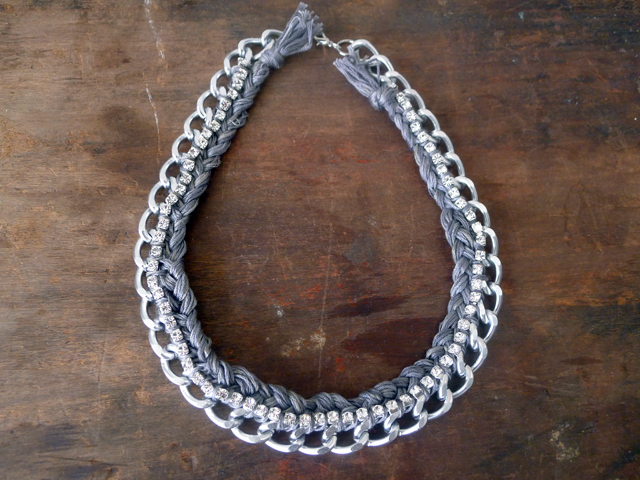
Hello TAGGers… it’s Erin, your DIY contributor, from Thanks, I Made It! For this month’s DIY, we asked you to contribute your ideas for my next project. We had some responses asking for easy, chunky statement necklaces, so I think this project will fit the bill. Using the same technique as the popular sparkly chain friendship bracelet, I whipped up a necklace while catching up on my Parks and Rec faster than you can say J.J.’s waffles (anyone?). Here’s how.
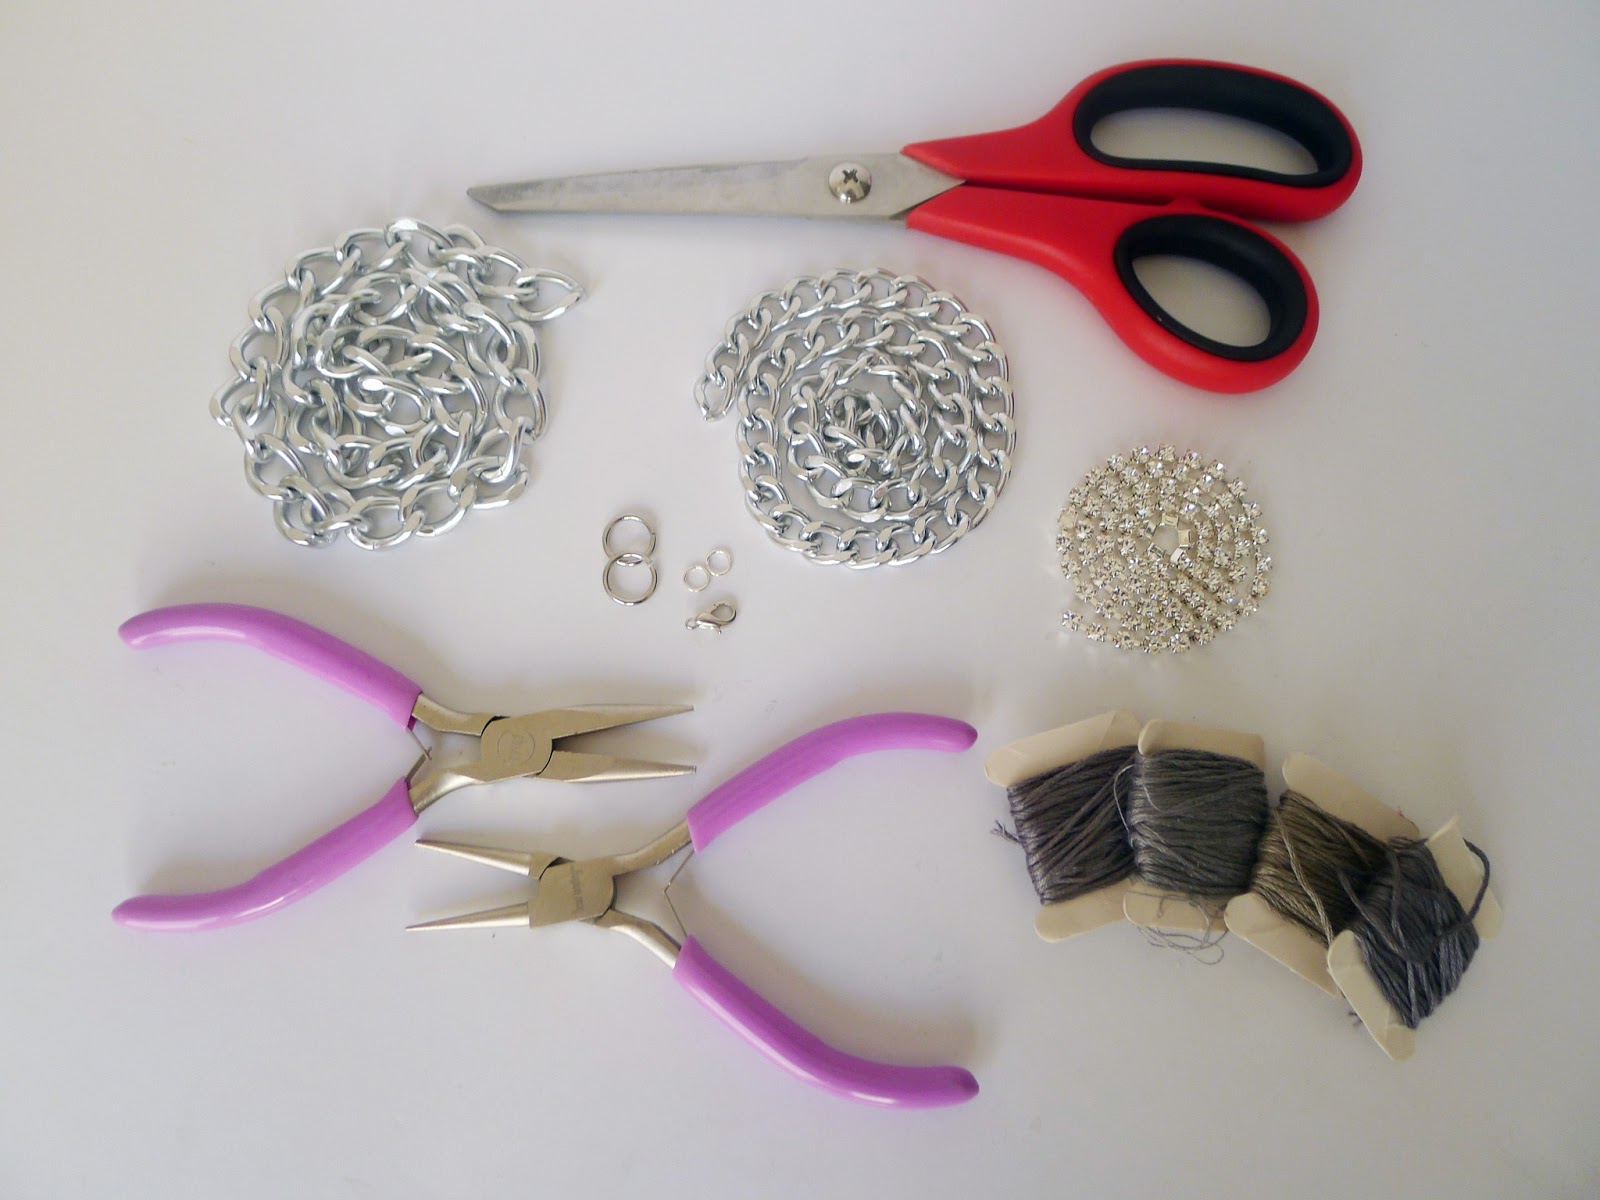
Tools and materials:
18 inches chain (I wasn’t sure what size I would go with, so I pictured two! I settled on this size)
18 inches rhinestone chain
4 skeins embroidery thread
Embroidery needle (not pictured)
Jump rings (big enough to fit around the chain) and clasp
Scissors
Jewelry pliers